
ID : 3106
RS-422A Communication Board Setting
The following describes how to set an RS-422A communication board.
Setting Procedure
Do the following steps for the board setting.
- Set a DIP switch.
- Install a board in a robot controller.
- Set necessary options with a teach pendant.
Setting a DIP Switch
Set the DIP switch of a channel to use as the following shows.
- Set the data transmission mode to RTS/CTS-looped full duplex.
- Enable the terminator.
Setting for COM-1PD(LPCI)H (1ch type)
Position of a DIP Switch
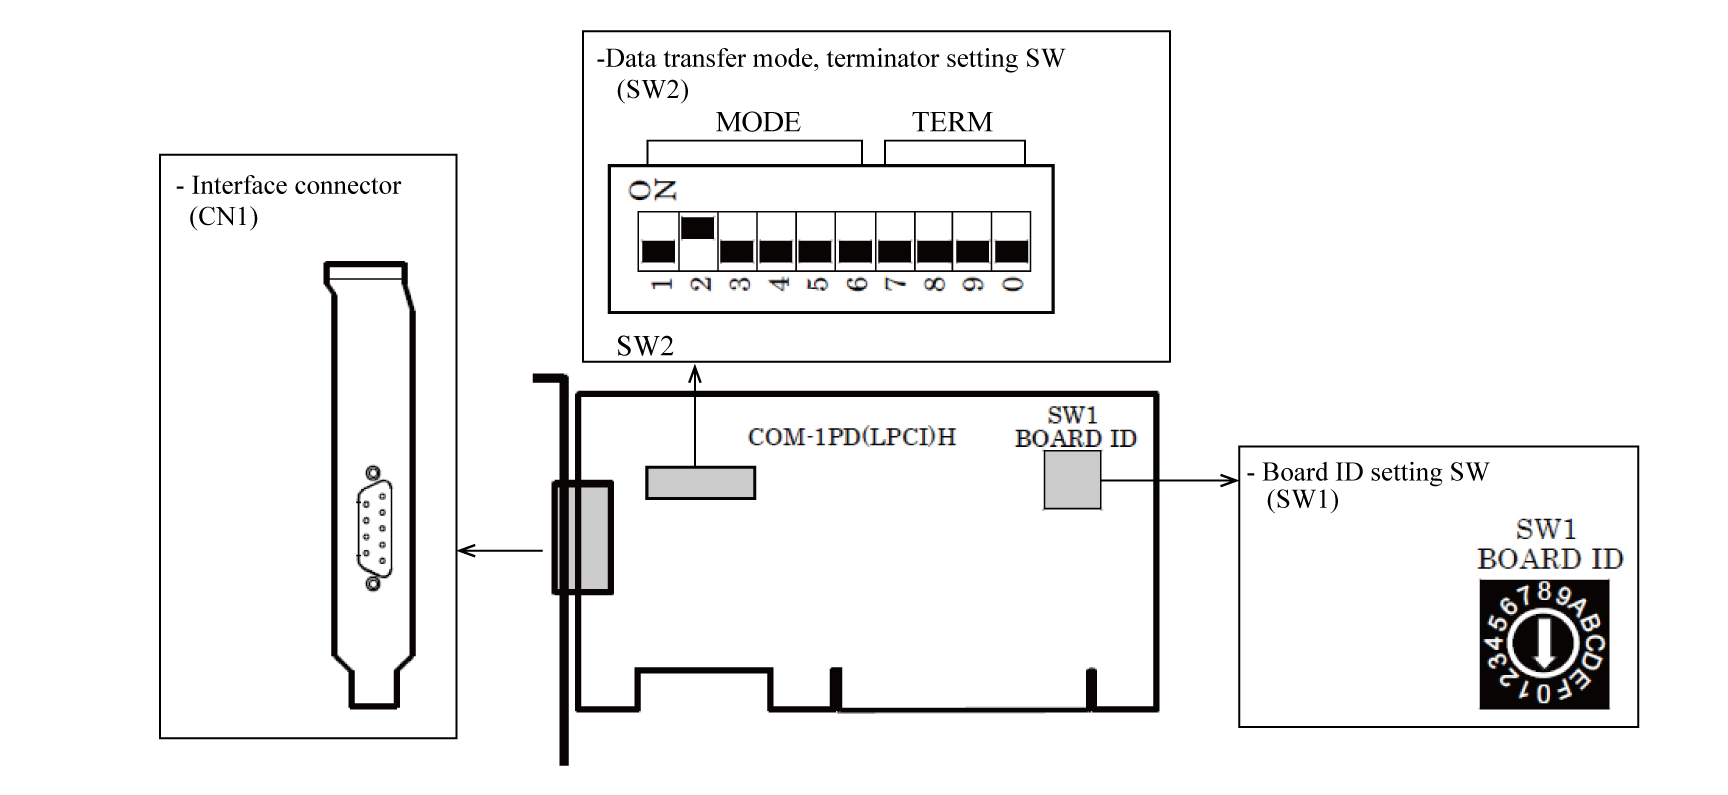
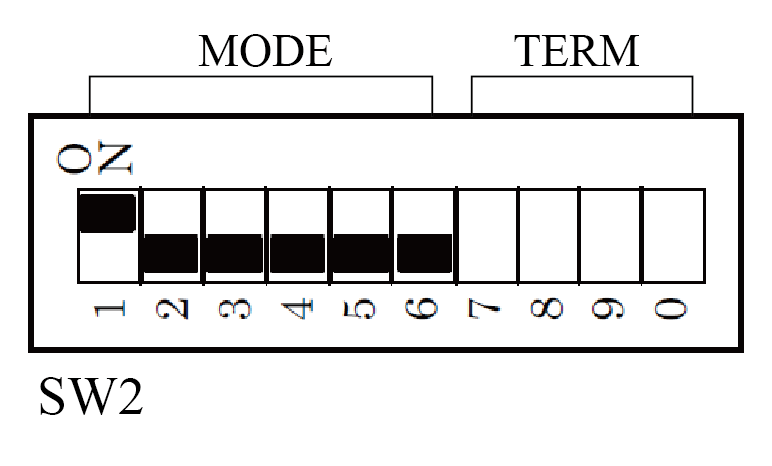
Switch Setting
| Function | Switch setting |
|---|---|
・Full duplex
|
Do not use with bits 1 and 2 both set ON as this may result in damage to the board. |
| Terminator inserted | 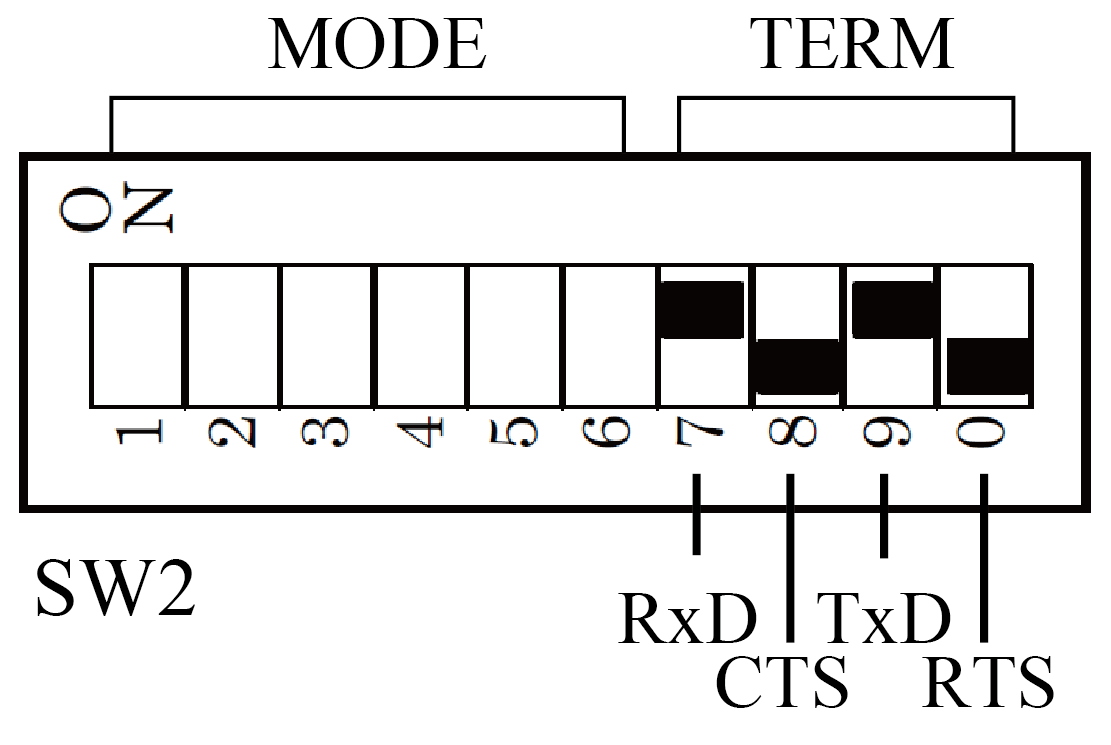 |

Setting for COM-2PD(PCI)H (2ch type) or COM-4PD(PCI)H (4ch type)
Both channels are available. Use a desired channel.
Position of a DIP switch
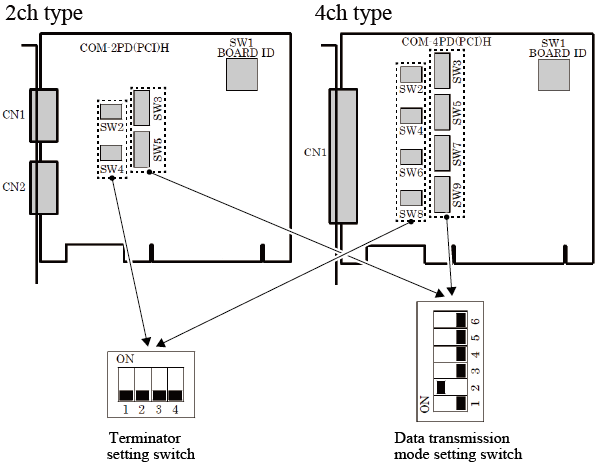
- Switches for 2ch type
-
Terminator
setting switchData transmission
mode setting switchChannel SW2 SW3 CH1(CN1) SW4 SW5 CH2(CN2) - Switches for 4ch type
-
Terminator
setting switchData transmission
mode setting switchChannel SW2 SW3 CH1 SW4 SW5 CH2 SW6 SW7 CH3 SW8 SW9 CH4
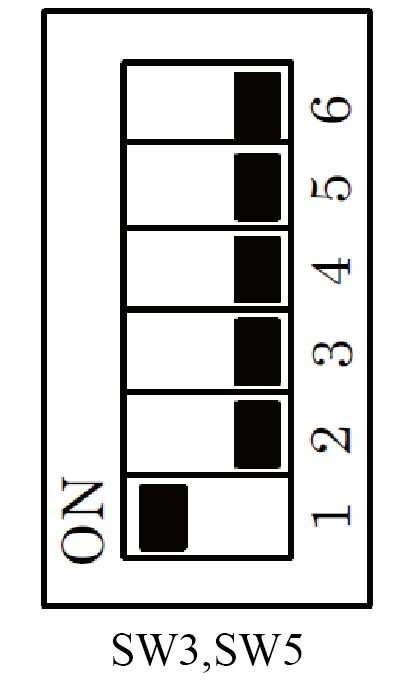
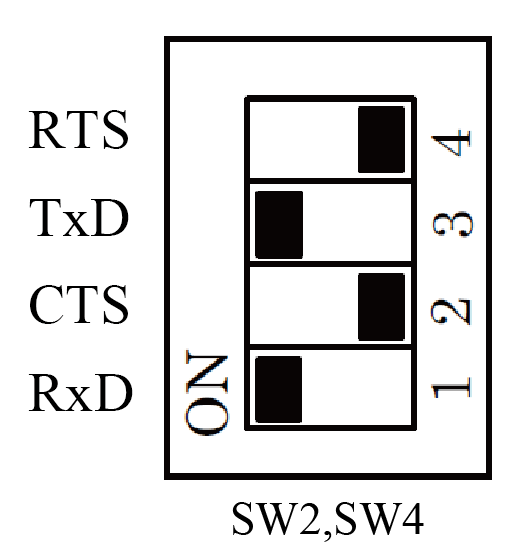
Switch Setting
Select a DIP switch of a channel to connect a force sensor.
| Function | Switch setting |
|---|---|
・Full duplex
|
Set the data transmission mode setting switch as the following image shows.
Do not use with bits 1 and 2 both set ON as this may result in damage to the board. |
| Terminator inserted | Set the terminator setting switch as the following image shows.
|
Installing a Board
Install a recommended expansion board in the PCI slot.
For information of how to install, refer to "Installing Expansion Board" of RC8 SERIES ROBOT CONTROLLER MANUAL.
Setting Necessary Options with a Teach Pendant
Set the following two options with a teach pendant.
- Enable a FIFO buffer.
- Select RS-422A as connection mode, and specify a port.
Enabling a FIFO Buffer
Operation path: [F6 Setting] - [F5 Comunication and Token] - [F2 Network and Permission]
From the Device list, select a port of RS-422A that connects to the force sensor.
From the Setting panel, from the Property column, select [FIFO buffer]. Press [Edit] button.
[FIFO buffer] window appears, select [Use]. Press [OK] button.
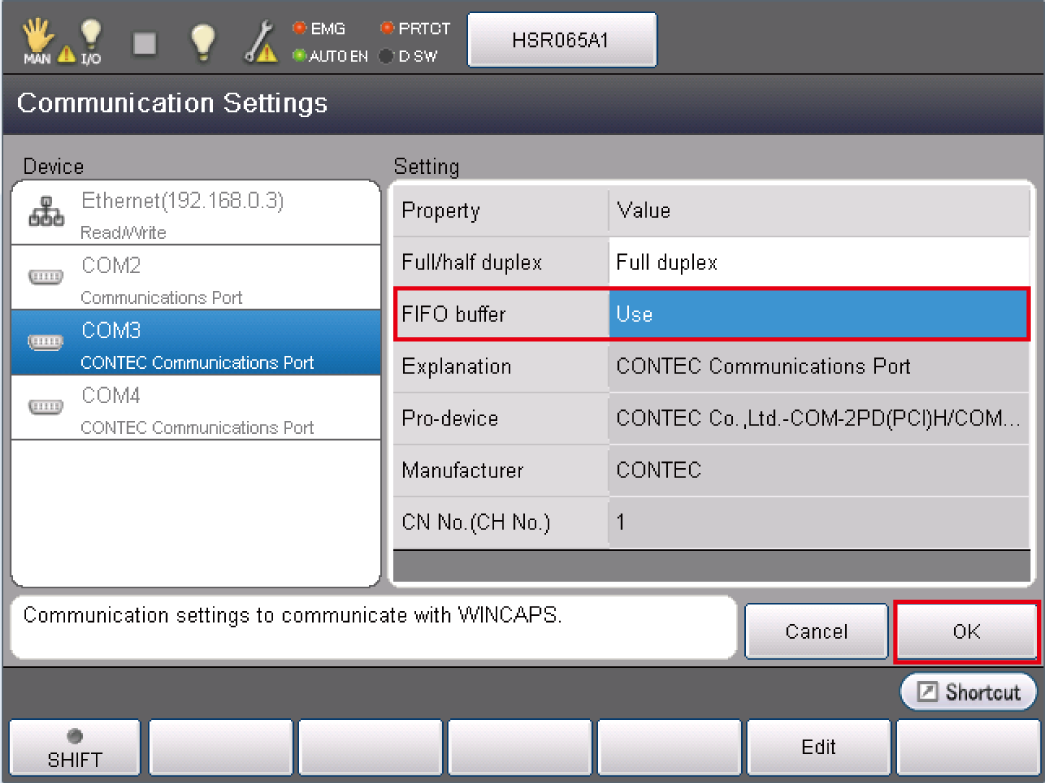
Once the setting finishes, on the "Communication Settings" window, press [OK] button.
For the Client port number of the "RS-422A Communication Setting" in the "Sensor Setting", enter the COM number selected the above setting.
Selecting RS-422A as Connection Mode
This setting is done when a force sensor's setting.
For details, refer to "RS422A Communication Setting" of "Sensor Setting".
ID : 3106