
ID : 5109
Enable/Disable Setting
Use the teach pendant or command to enable/disable the collision detection function. The initial value is set to "disabled."
The settings made with the teach pendant is kept after the controller power is turned OFF. The setting done by a command is discarded once the controller power is turned OFF. After the turning off, setting done by a teach pendant will be effective.
For details of the command, refer to CollisionDetection.
Setting Procedure During Automatic or Teach-check Operation
Before you enable the collision detection function in the auto mode or teach check mode, you need to select a collision detection parameter table, set the axis to configure, and specify the table to execute CollisionDetection command.
The following shows the setting method with a teach pendant.
There are two types of setting methods: To enable/disable all axes simultaneously. To enable/disable axis individually.
You cannot change the setting while robot is working.
You can set the table with SetCollisionDetection command. If the table is configured by both (SetCollisionDetection command and by the entry described here), the setting done by command precedes.
To Enable/Disable All Axes Simultaneously
This method is available for Ver. 2.7.* or later.
1
From the top window, press [F2 Arm] - [F6 Auxiliary function] - [F2 Collision/Interference] - [F1 Collision Detection].
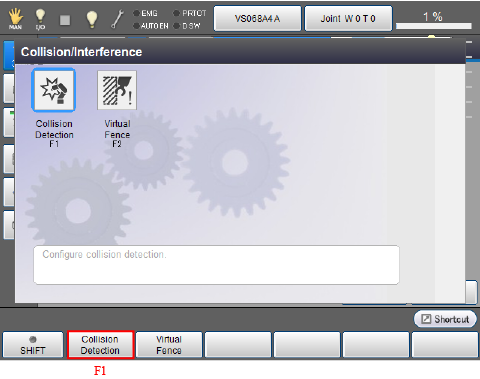
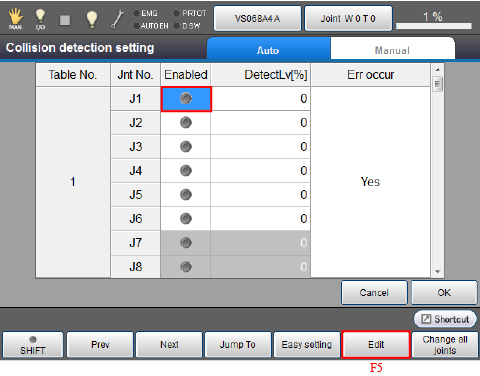
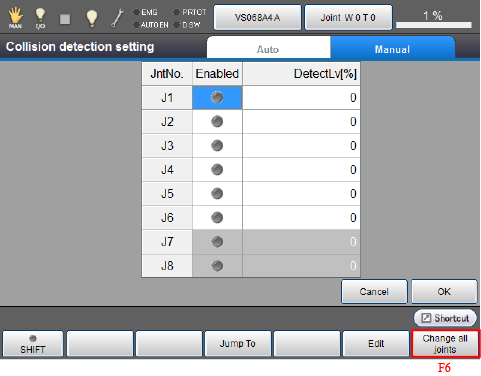
[Collision detection setting] window appears.
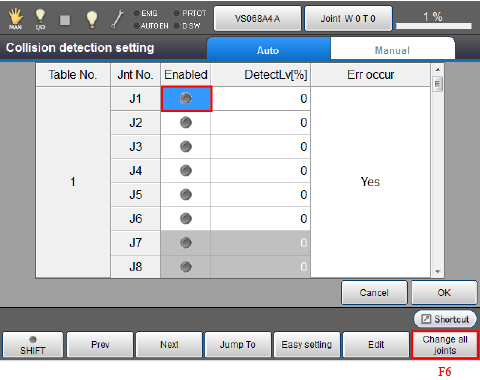
2
Select the axis numbers that you want to enable the collision detection function and press [F6 Change all joints].
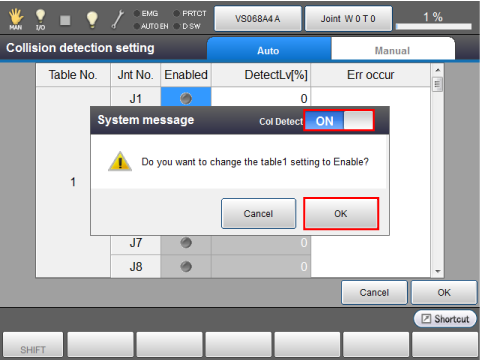
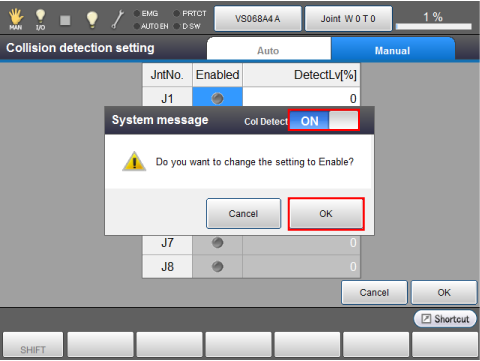
Once the system message appears, switch [Col Detect] to [ON] and click [OK].
Press [Cancel] to stop the setting change.
If you press [OK] while the [Col Detect] is [OFF], all axes will be disabled.
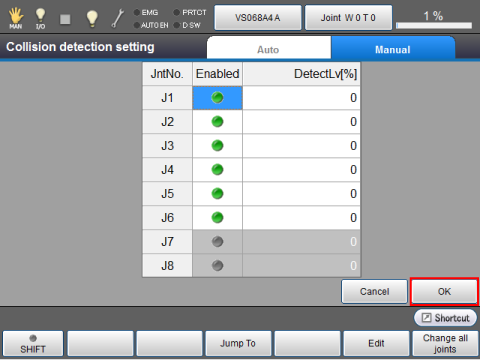
3
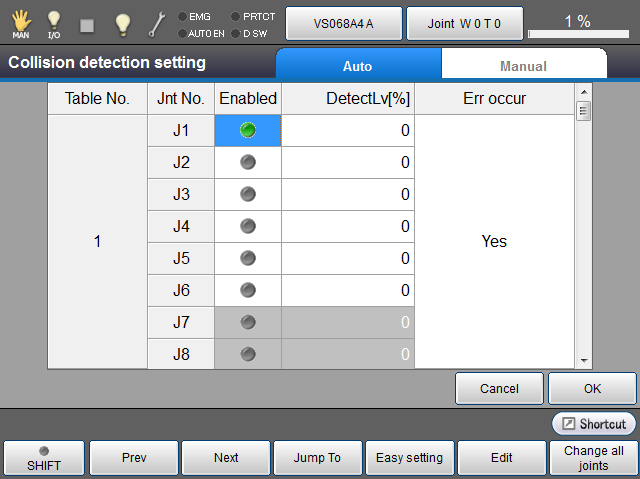
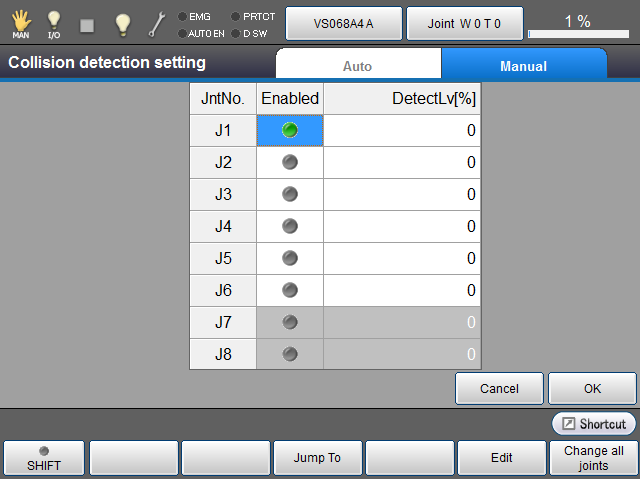
As the following image shows, enabled axis colors green.
When you have completed setting all the axes, press [OK].
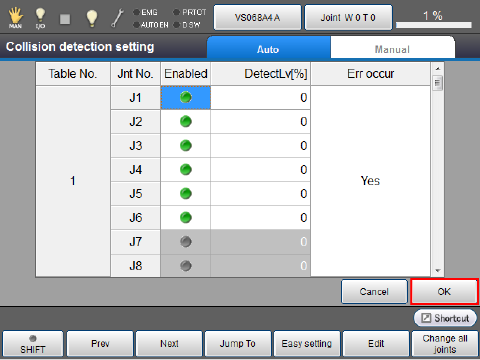
The settings are saved and the window returns to the [Collision/Interference] window.
4
To enable the collision detection function, specify a table number you have set, and then execute CollisionDetection command.
Example : Specify a table number 1 and enable the collision detection function.
CollisionDetection True,1
If the collision detection command is enabled by a command, it is disabled when one of the following conditions is met.
- Turning ON of "MOTOR".
- Specifying FALSE by Collision Detection command.
- Switching to Manual mode.
To Enable/Disable Axis Individually
In the step 2 of "To enable/disable all axes simultaneously", do the following procedures. For other procedures, do the same ways as "To enable/disable all axes simultaneously".
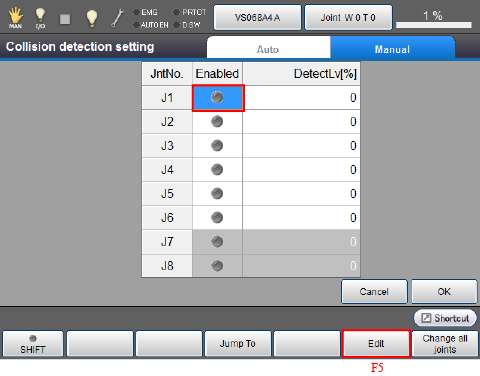
2
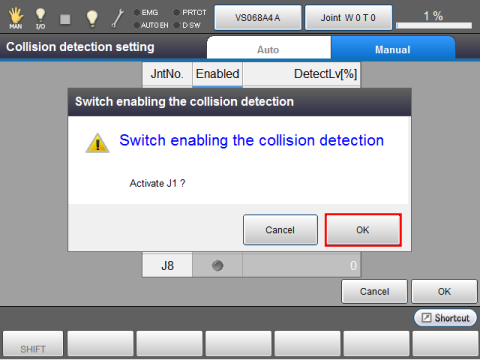
Select the axis numbers for which to enable the collision detection function and press [Enable] or [F5 Edit] for each axis number.
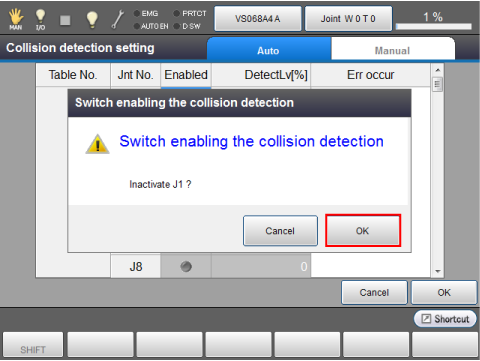
A system message is displayed. Press [OK] to confirm it.
Press [Cancel] to stop the setting change.
If J1 is enabled, a green mark is displayed as follows.
Repeat the above process for all axes that you want to enable.
Setting Procedure During Manual Operation
To enable the collision detection function in the manual mode, on the collision detection parameter table for manual operation, specify the axis to be enabled.
The following shows the setting method with a teach pendant.
There are two types of setting methods: To enable/disable all axes simultaneously. To enable/disable axis individually.
To Enable/Disable All Axes Simultaneously
1
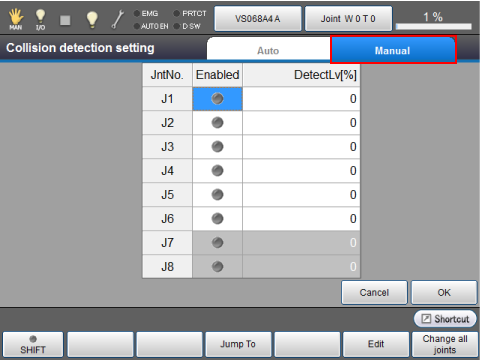
From the top window, select [F2 Arm] - [F6 Auxiliary function] - [F2 Collision/Interference] - [F1 Collision Detection] - [Manual] tab.
The following window appears.
2
Press [F6 Change all joints].
Once the system message appears, switch [Col Detect] to [ON] and click [OK].
Press [Cancel] to stop the setting change.
If you press [OK] while the [Col Detect] is [OFF], all axes will be disabled.
3
As the following image shows, enabled axis colors green. Press [OK].
The settings are saved. Collision detection function on the specified axis is enabled an the window returns to the [Collision/Interference] window.
To Enable/Disable Axis Individually
In the step 2 of "To enable/disable all axes simultaneously", do the following procedures. For other procedures, do the same ways as "To enable/disable all axes simultaneously".
2
Select the axis numbers for which to enable the collision detection function and press [Enable] or [F5 Edit] for each axis number.
A system message is displayed. Press [OK] to confirm it.
Press [Cancel] to stop the setting change.
If J1 is enabled, the [Enabled] cell next to the J1 turns green.
Repeat the above process for all axes that you want to enable.
How to Check the Collision Detection Function Enable/Disable Status
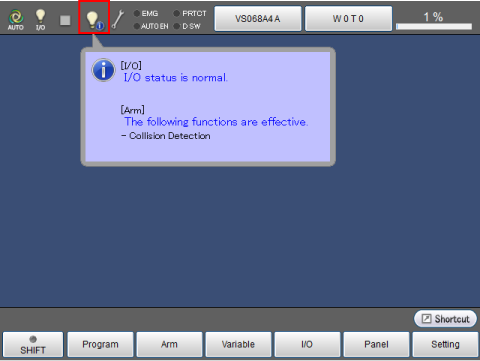
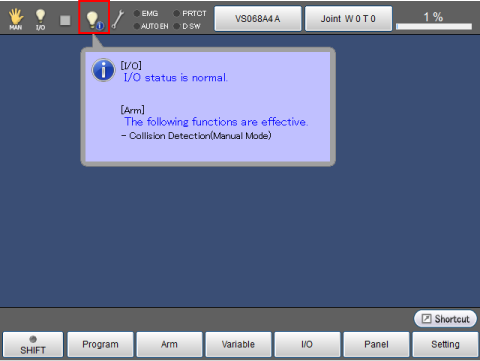
To check the collision detection enable/disable status, press the arm status icon on the top of the window.
The display differs between the auto/teach check mode and the manual mode.
Collision Detection Is Enabled in the Auto/Teach Check Mode
Collision Detection Is Enabled in the Manual Mode
ID : 5109