
ID : 2978
[Sensor Tracking] Setup Procedure of Free Curve Interpolation
The following explains the setup procedure of free curve interpolation (TrackMove S) during sensor tracking.
When doing with more than 2 robots, execute "Free curve motion setting" for slave controller according to the procedure below.
- Press [F1 Start the trigger detection] on the tracking screen of master controller.
- Specify the conveyor No. which you want to set with the slave controller.
- Execute "Free curve motion setting" on the tracking screen of slave controller.
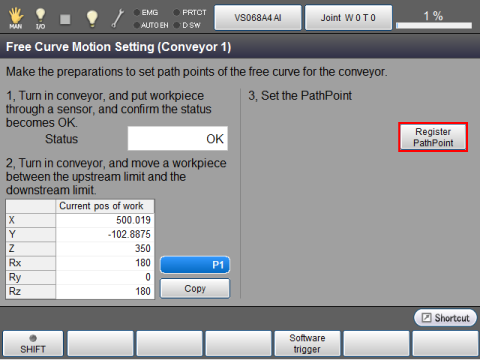
1
Operation path: [F10 Tracking]
Press [Free curve motion] button of the conveyor to execute the free curve interpolation.
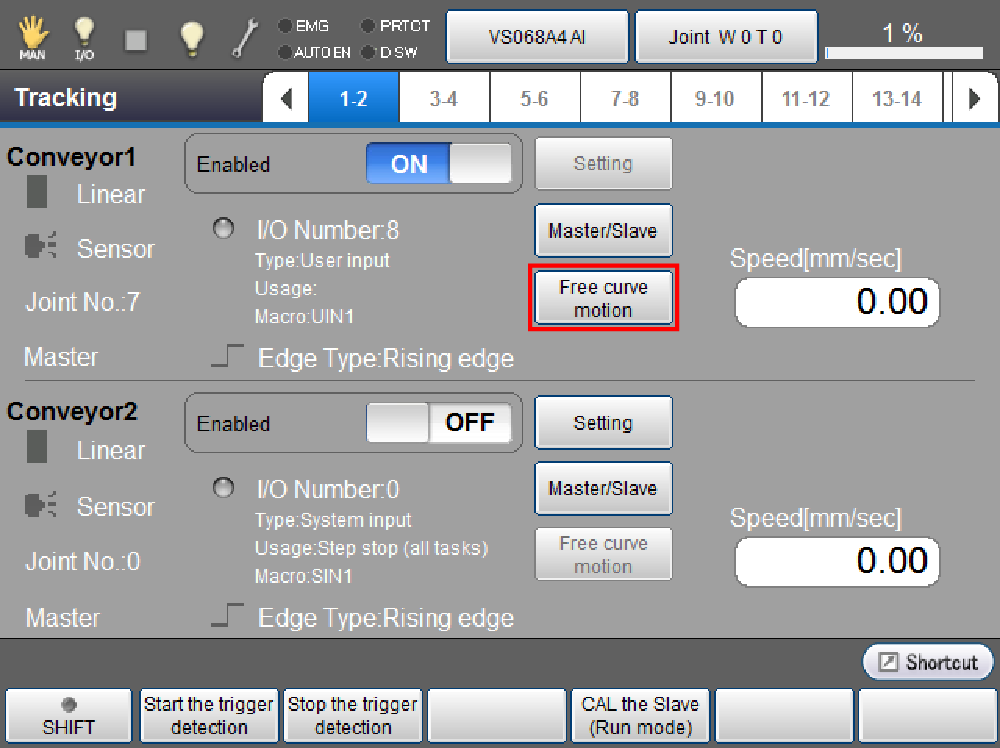
During the setting of path points with "Free curve motion setting", do not change tools and/or work coordinates.
2
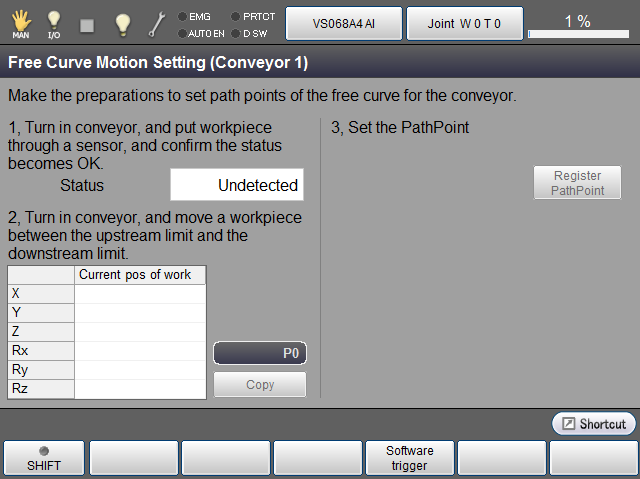
"Free Curve Motion Setting" screen appears.
3
Preparations displayed on the screen are required.
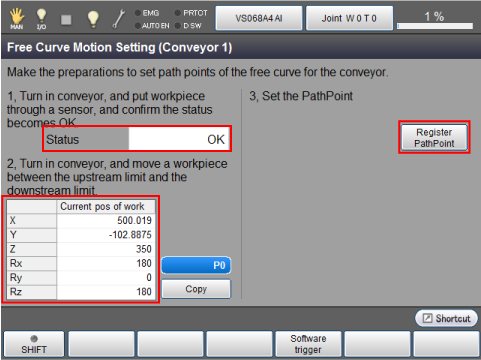
- Turn in conveyor, and put workpiece through a sensor, and confirm the status becomes OK.
- Turn in conveyor, and move a workpiece between the upstream limit and the downstream limit.
Entire workpieces should be between the upstream limit and the downstream limit.
After preparing 1 and 2, [Register PathPoint] button will be enabled.
4
Register the work coordinate for AddPathPoint command. This function is available in Ver.2.7.* or higher.
This operation is not required if AddPathPoint is not used.
On the teach pendant window, pressing the variable number button will display the numeric keypad of [Input Copy to var P.]. Enter the number and press [OK].
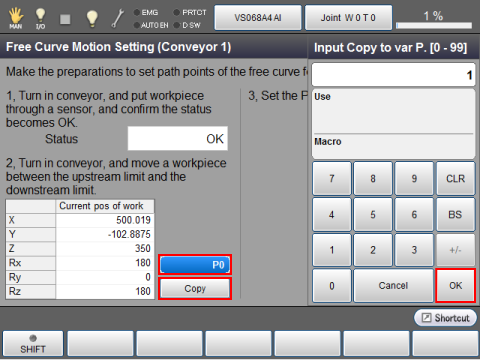
Pressing [Copy] copies the current position of the workpiece into the variable.
The position registered here will be used as the guaranteed entry [Work coordinate] of AddPathPoint command.
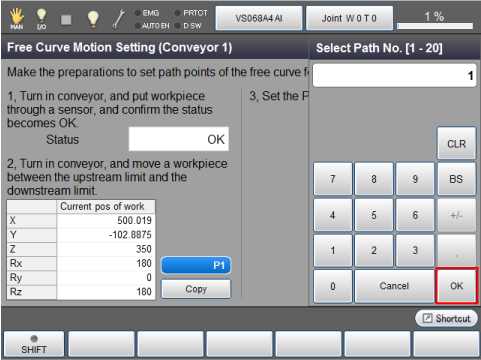
5
Once pressed [Register PathPoint] button, the screen for Path No. will be displayed. Specify the path No. you want to register, and press [OK].
6
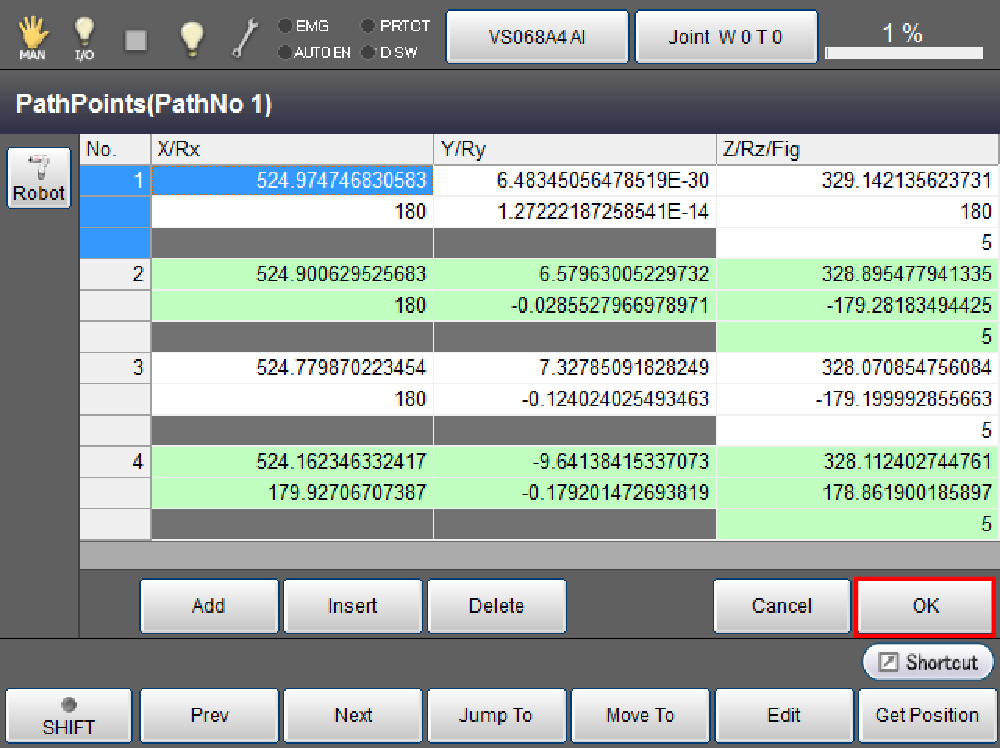
Move the robot to the teaching position on the [PathPoints] screen and press [Add].
For further information about displays, refer to "Path Points Setting Window".

- Do not drive the conveyor on the [PathPoints] screen.
- Depending on a teaching position of its path point, the tracking operation may be executed at upper position than the upstream limit.
For adjusting tracking start position, use TrackInRange command.
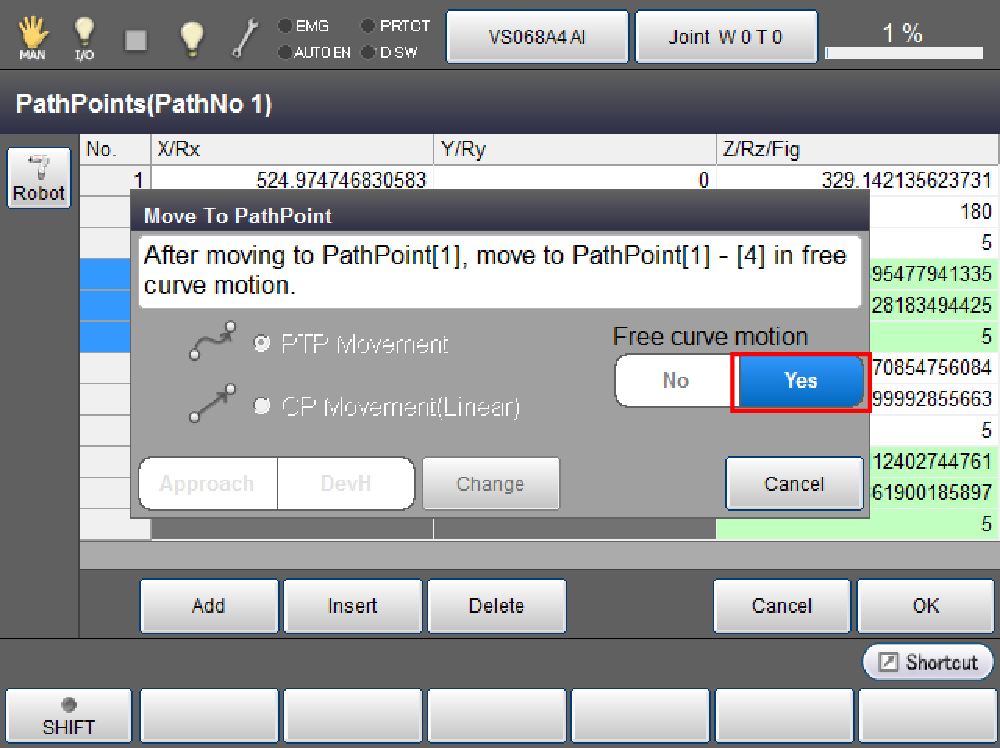
7
After teaching all the path points, confirm these path points by pressing [F4 Move to] button.
Select Yes/No to "Free curve motion".
- Select No to "Free curve motion".
After specifying PTP or CP, select the path points to press [Move]. Keep pressing OK key while pressing deadman switch.
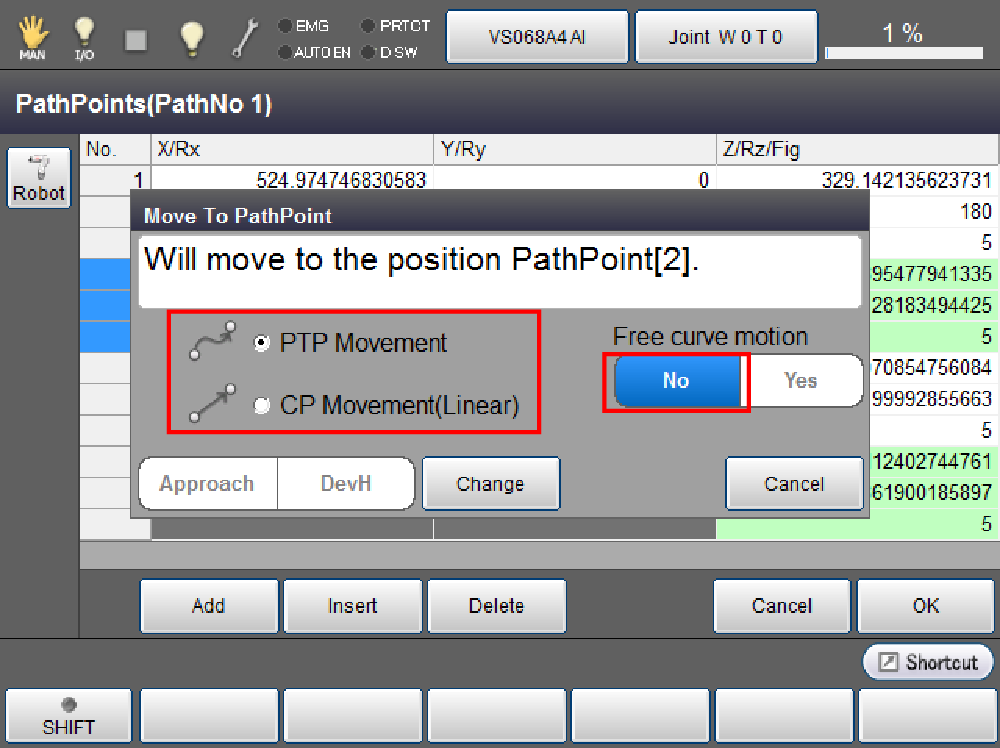
When you specify an approach distance with "Approach" button, you can move a robot to given approach position. When coordinate values (X, Y, Z, Rx, Ry, and Rz) are specified with "DevH" button, the robot will move to the position that was offset by the specified distance from the position specified by variable.
- Select Yes for "Free curve motion".
After moving to the path point [1], the robot passes through all the specified path points by free curve interpolation. Keep pressing OK key while pressing deadman switch.
8
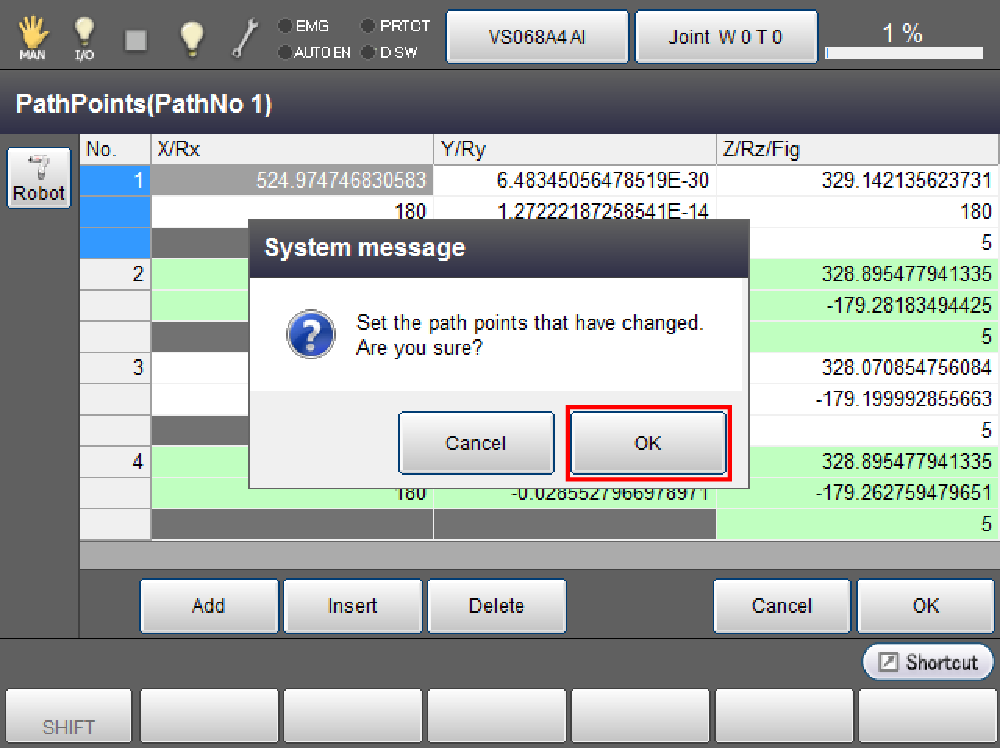
When confirmation is complete, press [OK].
9
After confirming the message, press [OK]. The path will be registered. The free curve motion setting is complete.
ID : 2978