
ID : 2260
Setting an Exclusive Area with WINCAPSIII
Create an exclusive area with Arm modeling of WINCAPSIII, and then output the data to the controller.
This process must be done on both the master and slave controllers.
Login level is Programmer.
Procedures for Creating the Exclusive Area
1
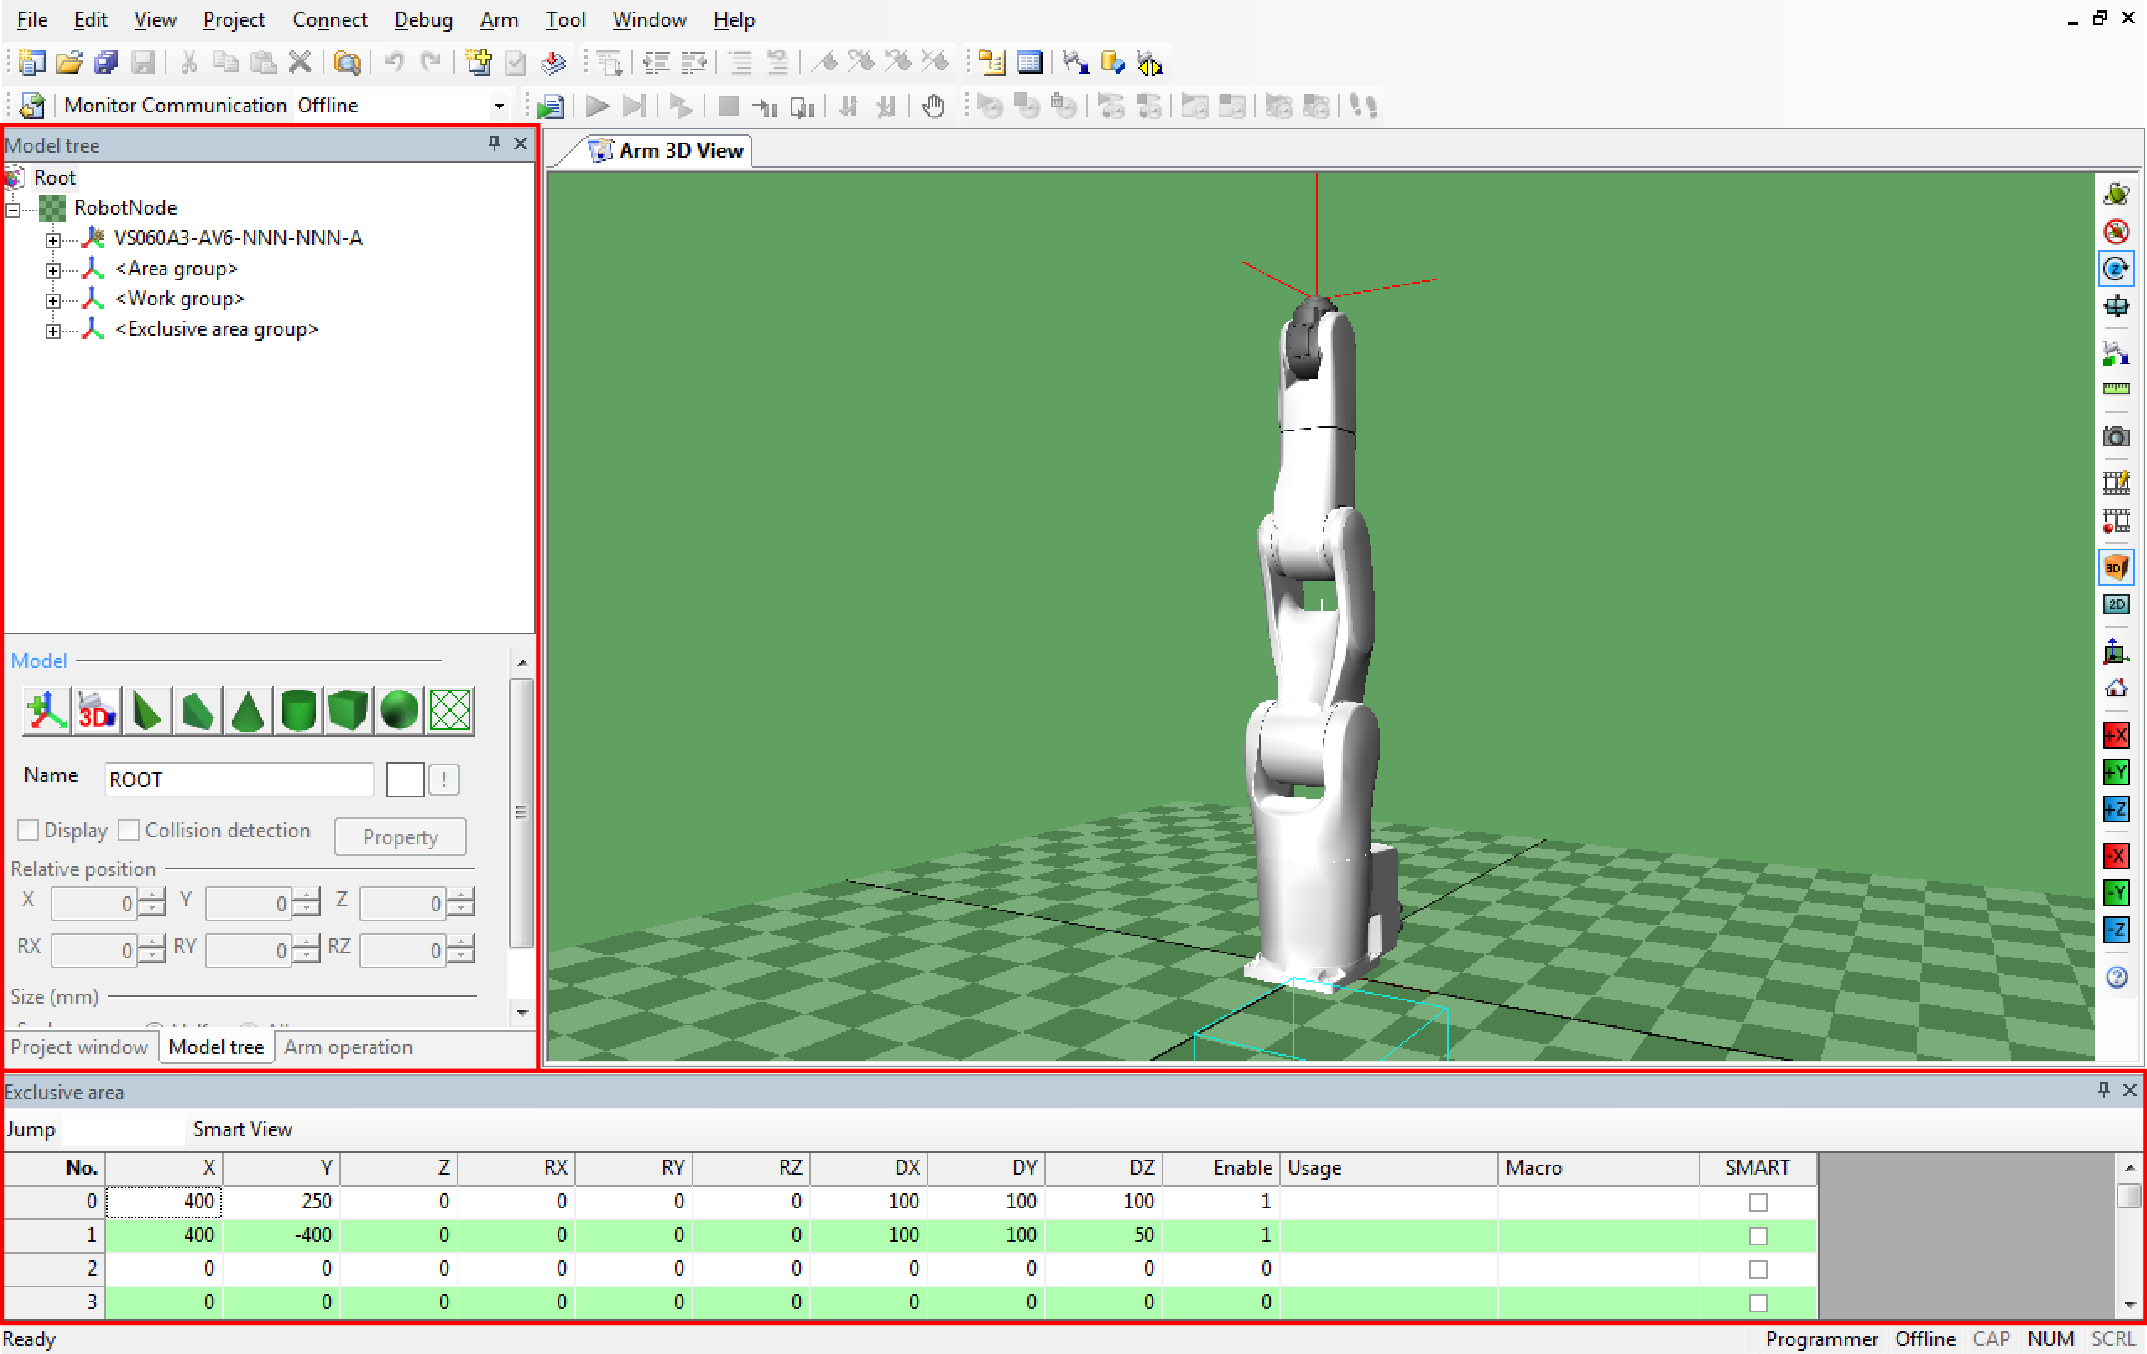
Open the [Model tree] window of WINCAPSIII to create an area.
When you use this function first time, open Exclusive area window.
Operation path : [Menu] – [View] – [Arm coordinate] – [Exclusive area]
From Exclusive area window, set the size and position of an exclusive model.

| Item | Content |
|---|---|
| No. | Area number |
| X | Position X |
| Y | Position Y |
| Z | Position Z |
RX |
Attitude X |
| RY | Attitude Y |
| RZ | Attitude Z |
| DX | Size X |
| DY | Size Y |
| DZ | Size Z |
| Enable | 1: Enable 0: Disable |
2
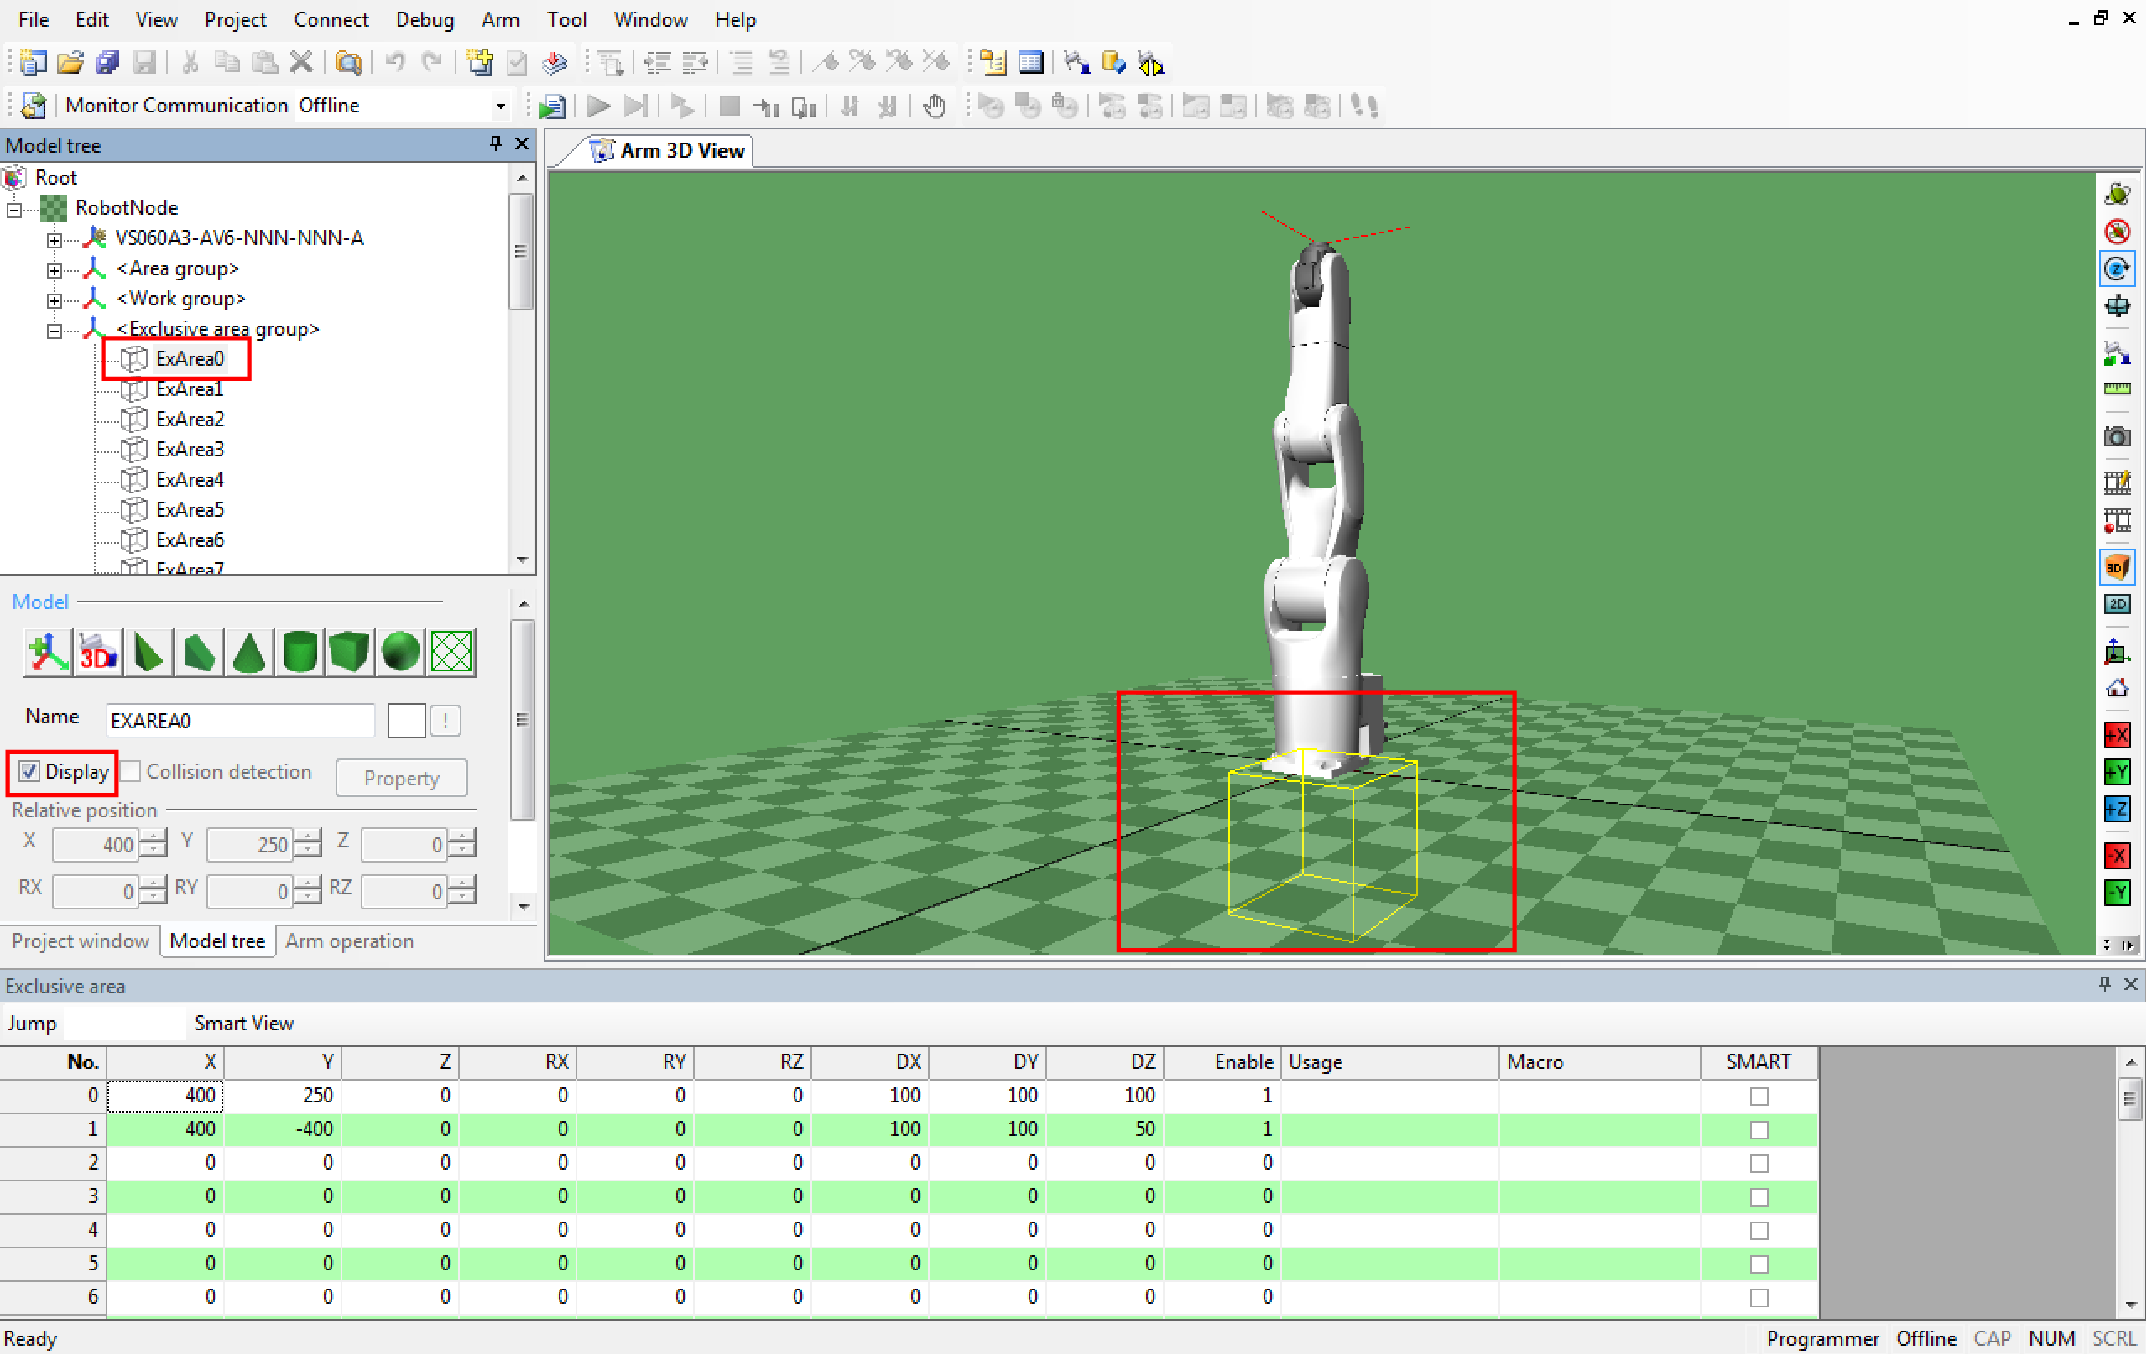
An area will be displayed when the [Display] check box of the exclusive area is selected in the [Model tree] window.
3
To create multiple exclusive areas, repeat from STEP 1 to STEP 2.
4
Export the exclusive area data.
From the menu bar, click Arm, click Export virtual fence / exclusive control data.
Once the processing completes, a message will be displayed. Click [OK].
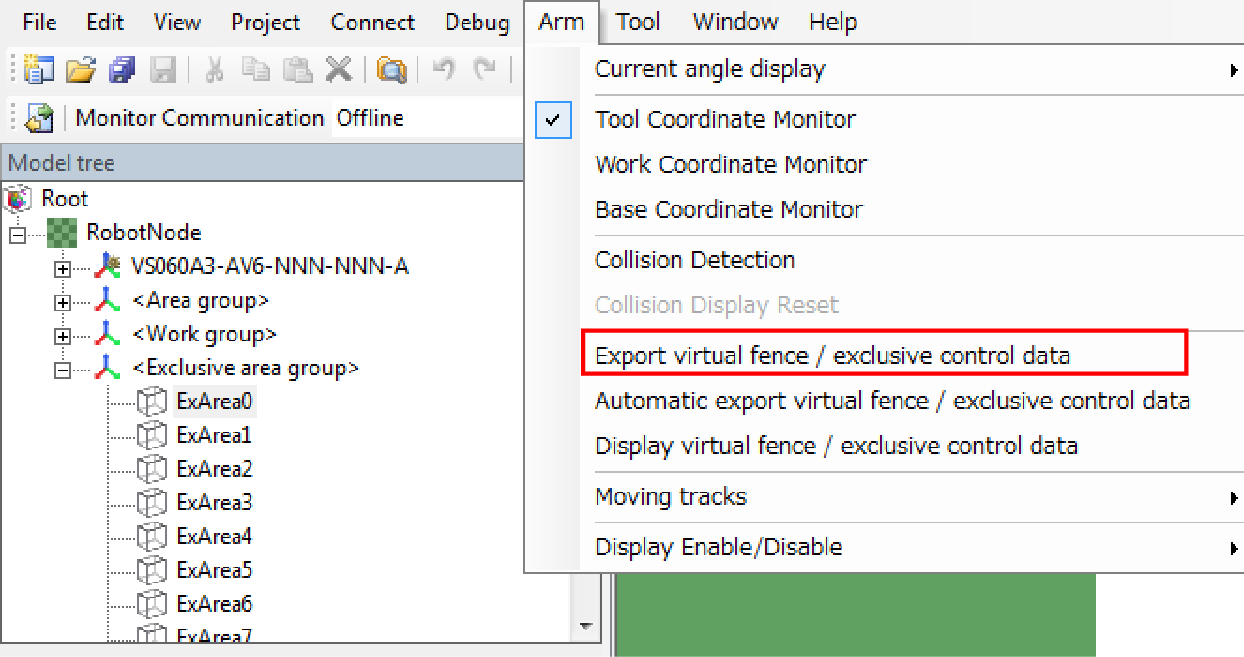
You can check the exported exclusive control data by selecting the menu [Arm] - [Display virtual fence / exclusive control data].
5
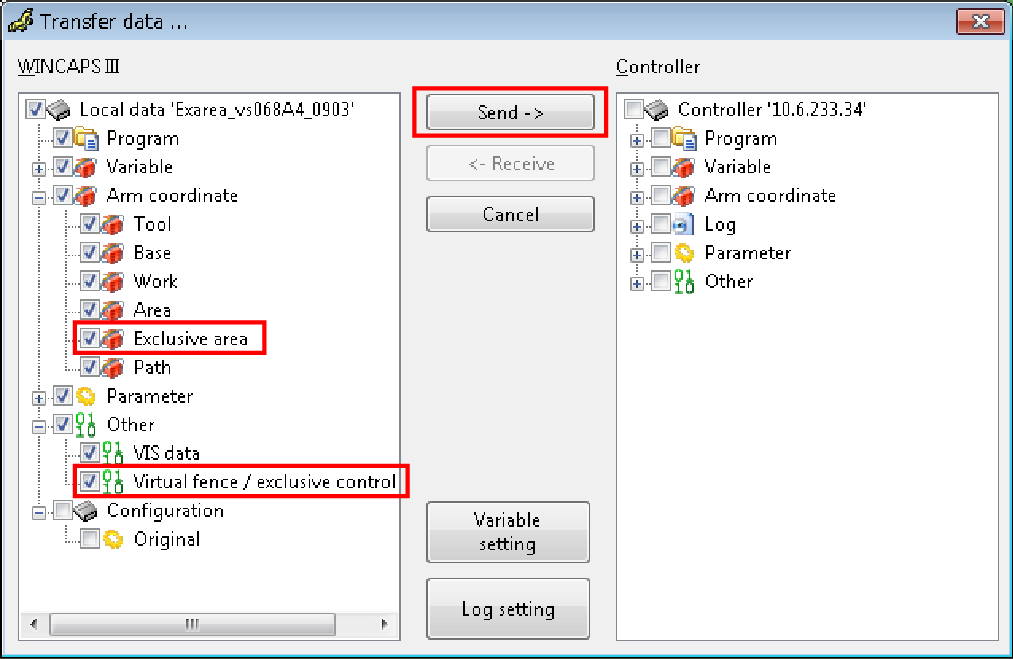
Send the data to the controller.
Confirm that the check boxes of "Exclusive area" and "Virtual fence/ exclusive control" are selected, and then send the data to the controller.
For information on how to establish communication between WINCAPSIII and robot controller, refer to "Communications Settings" and "Data Transfers" in "WINCAPSIII GUIDE".
Reboot the controller after sending the data.
To perform this step, the robot controller and WINCAPSIII must be connected with a cable. For information on how to connect, please refer to "Link with Robot Controller" in "WINCAPSIII GUIDE".
You can also use the USB memory to transfer data. For further details, refer to "Using USB to Transfer Data".
6
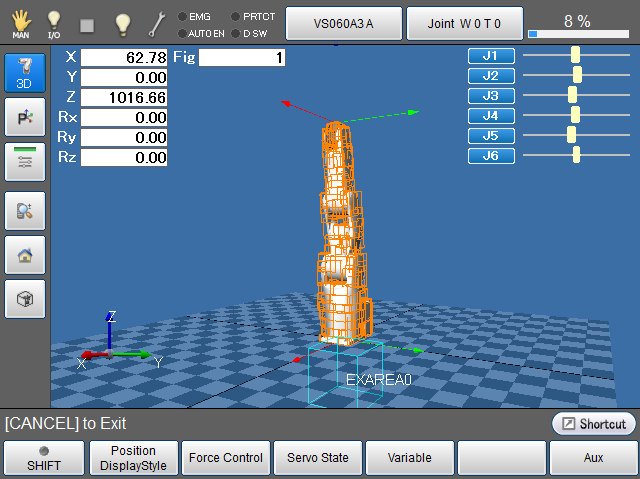
With a teach pendant, open the Arm window.
To display exclusive control data, from the Arm Display Setting window, set desired objects (Exclusive Area, Arm supervision model, and Tool supervision model) to "Display", from the Exclusive Communication Setting window, set "329: Exclusive control controller configuration" to "1: Master controller" or "2: Slave controller", and then reboot the controller.
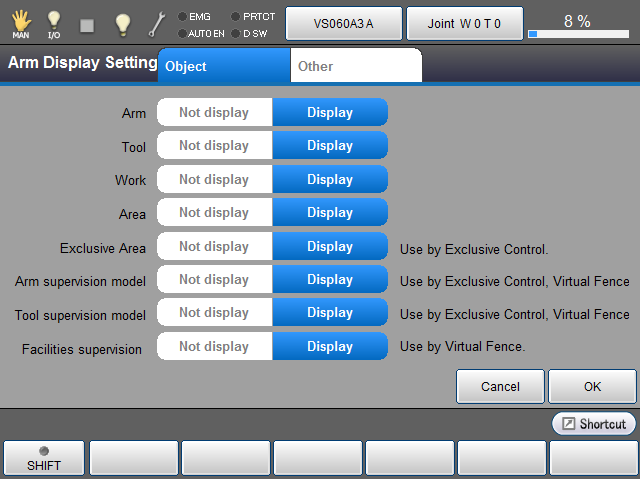
Displaying/Hiding Exclusive Control Data
You can display/hide the exclusive area or monitoring model.
Operation path : [Menu] - [F2:Arm] - [F6:Aux] - [F7:Display Settings]
Select [Not display] or [Display] of each item, and then press the [OK] button.
ID : 2260
- Related Information
- Using USB to Transfer Data